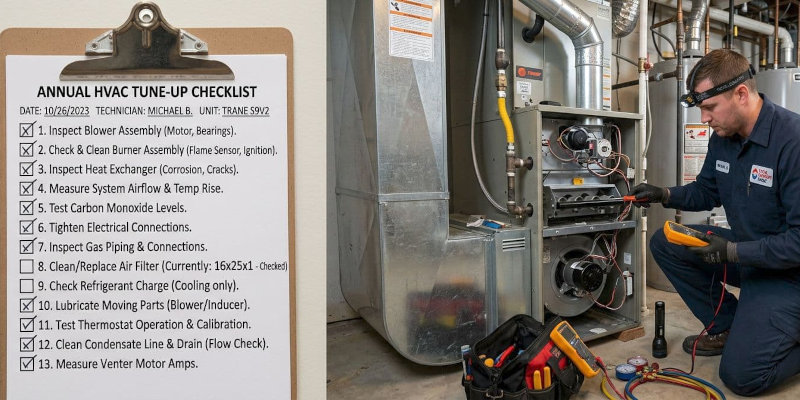
Your HVAC system is arguably the most important piece of equipment in your home, responsible for keeping you comfortable year-round. But like any complex machine, it requires regular maintenance to operate efficiently, reliably, and, importantly, to prevent expensive breakdowns. While a professional HVAC tune-up is still crucial, taking a proactive approach with a self-checklist can significantly extend the life of your system, improve its energy efficiency, and often catch minor issues before they escalate. This comprehensive checklist provides a starting point for assessing your HVAC’s health – a way to ensure you’re prepared for the next visit with a technician and potentially save money in the long run.
Why a DIY Checkup Matters
Many homeowners delay scheduling a professional HVAC service, often waiting until their system starts acting up or is running inefficiently. However, preventative maintenance doesn’t have to be overwhelming or expensive. Performing a regular self-checkup can expose potential problems that a technician might initially overlook, especially if they are dealing with a high volume of appointments. A little time invested upfront can prevent small issues – like a dirty air filter or a loose wire – from transforming into major, costly repairs. Furthermore, maintaining your HVAC system is an investment in your home’s energy efficiency, translating into lower utility bills. Finally, a documented self-checkup provides valuable information for your technician, facilitating a more targeted and effective service.
Section 1: Initial Visual Inspection & Basic Checks
Before diving into the more detailed aspects, a quick visual inspection can reveal obvious problems. This initial assessment is vital for ensuring your system is safe and functioning correctly.
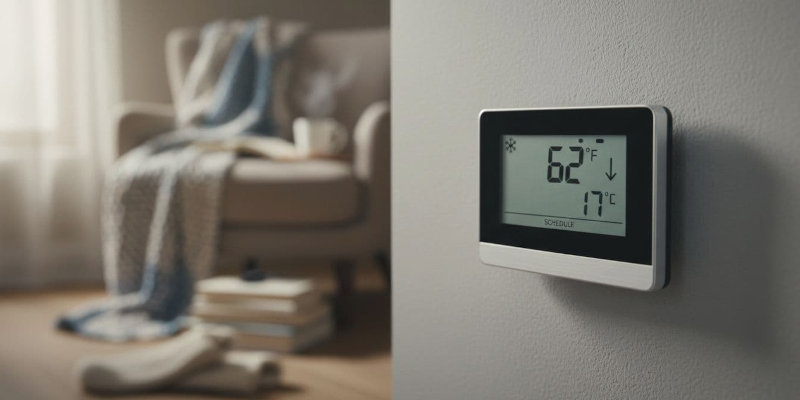
1. Thermostat Assessment:
- Check the Display: Is the display showing the correct temperature? A frozen or blank display could indicate a wiring issue or a faulty thermostat.
- Battery Check: If your thermostat uses batteries, replace them – even if they seem to be working. Low batteries can cause erratic behavior.
- Temperature Settings: Ensure the thermostat is programmed correctly for your needs, considering the season.
- Wiring: Carefully inspect the wiring connecting the thermostat to the furnace or air handler. Look for loose connections, frayed wires, or signs of damage.
2. Outdoor Unit Inspection:
- Clearance: Make sure the outdoor unit (condenser) is free of debris – leaves, branches, grass clippings, and snow. Overgrown vegetation restricts airflow and reduces efficiency. Aim for at least 2 feet of clearance.
- Fan Operation: Listen to the fan. It should spin freely and quietly. If it’s noisy or doesn’t spin, it may need cleaning or repair.
- Fin Damage: Examine the fins on the condenser unit. Bent or damaged fins impede airflow and reduce cooling capacity. You can gently straighten bent fins with a fin comb (available at most hardware stores).
Section 2: Digging Deeper: System Components & Potential Issues
Once you’ve conducted the basic visual inspection, it’s time to delve deeper into your HVAC system’s components. This requires a bit more knowledge, but with a few simple checks, you can identify potential problems early.
3. Air Filter Inspection & Replacement
- Frequency: Change your air filter at least every 1-3 months, depending on the filter type, your home’s environment, and the presence of pets. More frequent changes are needed in dusty environments or if you have pets.
- Filter Type: Understand the different filter types (fiberglass, pleated, HEPA) and choose the one that best suits your needs. Pleated filters offer better filtration and last longer.
- Filter Condition: Inspect the filter for dirt and debris. If it’s heavily soiled, replace it immediately. A clogged filter restricts airflow, leading to reduced efficiency, increased energy consumption, and premature equipment wear.
4. Ductwork Inspection (Limited)
- Visible Ductwork: Visually inspect accessible ductwork for leaks, disconnections, or damage. Look for obvious gaps or tears.
- Tape Seals: Duct tape is not a long-term solution for sealing leaks. However, if you find minor leaks, you can temporarily seal them with foil tape (not duct tape).
5. Belt and Motor Checks (If Applicable):
- Older Systems: If your system has a belt-driven compressor, inspect the belts for wear, cracks, or looseness. Replace them if needed. Listen for any squealing or unusual noises.
- Motor Noise: Listen to the motor for unusual noises, such as grinding or rattling. This could indicate a motor bearing problem.
Note: This blog post provides a general checklist. Always consult with a qualified HVAC technician for professional diagnosis and repair recommendations. If you are in Rock Springs, Green River, Purple Sage, or Reliance, give Aarons a call!